Table of Contents
Categories are important for search engine optimization and for organizing your content around themes. Website visitors will have a much easier time navigating your site if it is well organized – and when visitors have an easier time, visitors are happy! So let's dig into learning just how to add categories to your blog posts, because...
You wouldn't want your site visitors to be sad, would you?

We didn't think so! Let's take a look at how to keep your site visitors happy using categories on DropInBlog.
How to Add a Category
DropInBlog's category feature works in a similar way to the authors feature – so if you've already read our post on how to add an author, this should be familiar.

Categories can be added via the Categories page. You can get there by clicking the "Categories" link in the top nav bar of your admin panel.
Once you're there, click "Add Category" to create a new category. Add a title for your category. The title should be short and descriptive – one or two words is usually best. For example, if you write a lot of posts about dog training, you might want to create a "Dog Training" category (obviously).
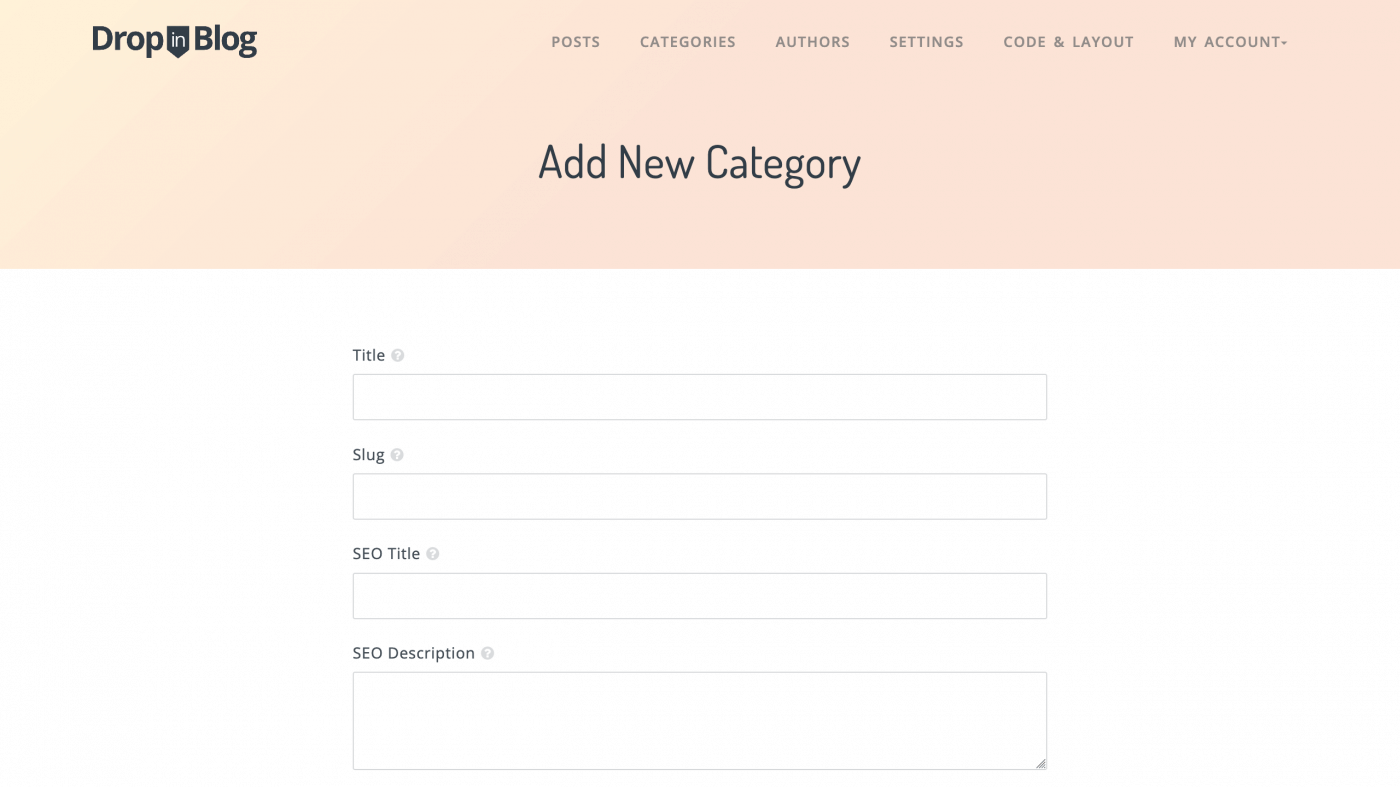
Next, add a slug, an SEO Title, and an SEO Page Description. The slug will mostly be used for URLs associated with the category, and the SEO components are what help search engines index and rank your post in results. See the previous post on Authors if you'd like to learn a bit more about slugs. We also talked about SEO Title and SEO Page Description in more detail in How to Get Better Search Engine Rankings with the DropInBlog SEO Analyzer.
Adding Categories to Your Posts
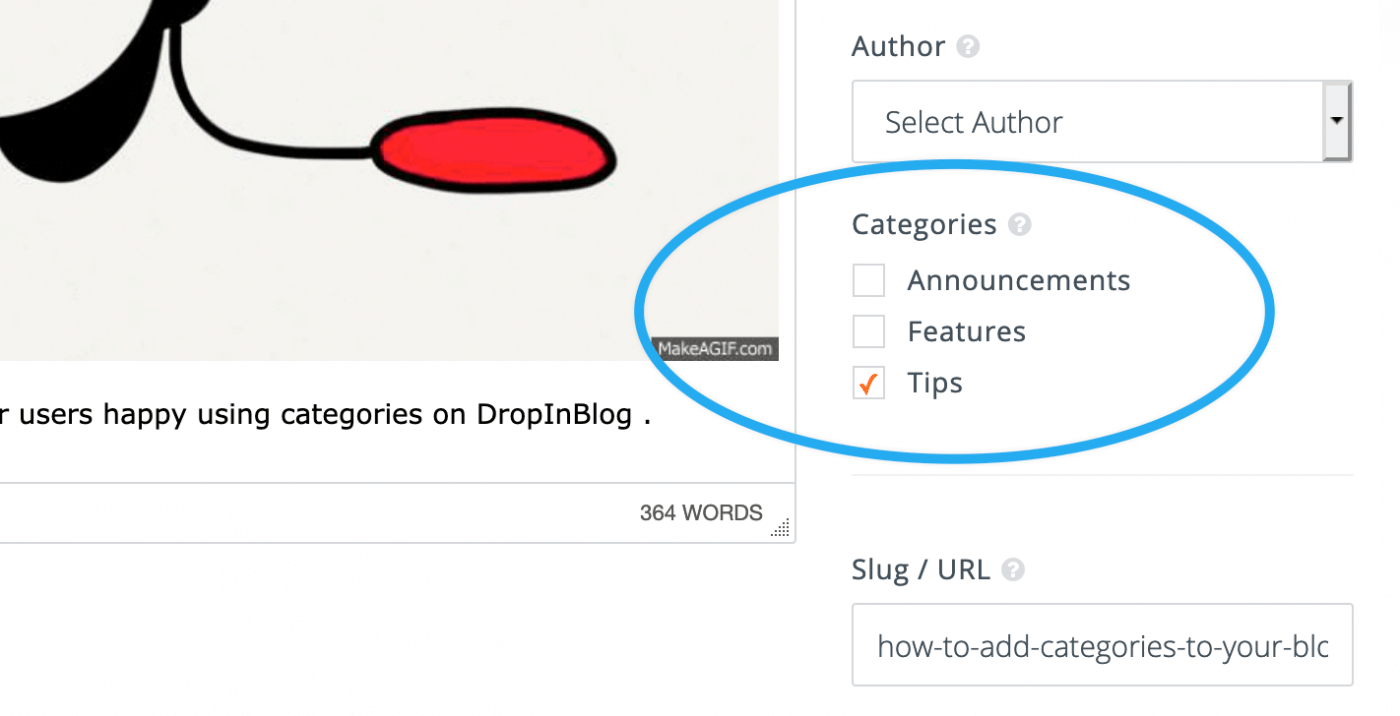
Once you've created your categories, you can add categories to your blog posts with just one click! The "Categories" section is below the "Authors" dropdown in the main editor window. Simply check the categories you want to assign to your post.
When you view your published post, you will see the categories listed next to it. Clicking a category will take you to a page showing all the posts in that category:
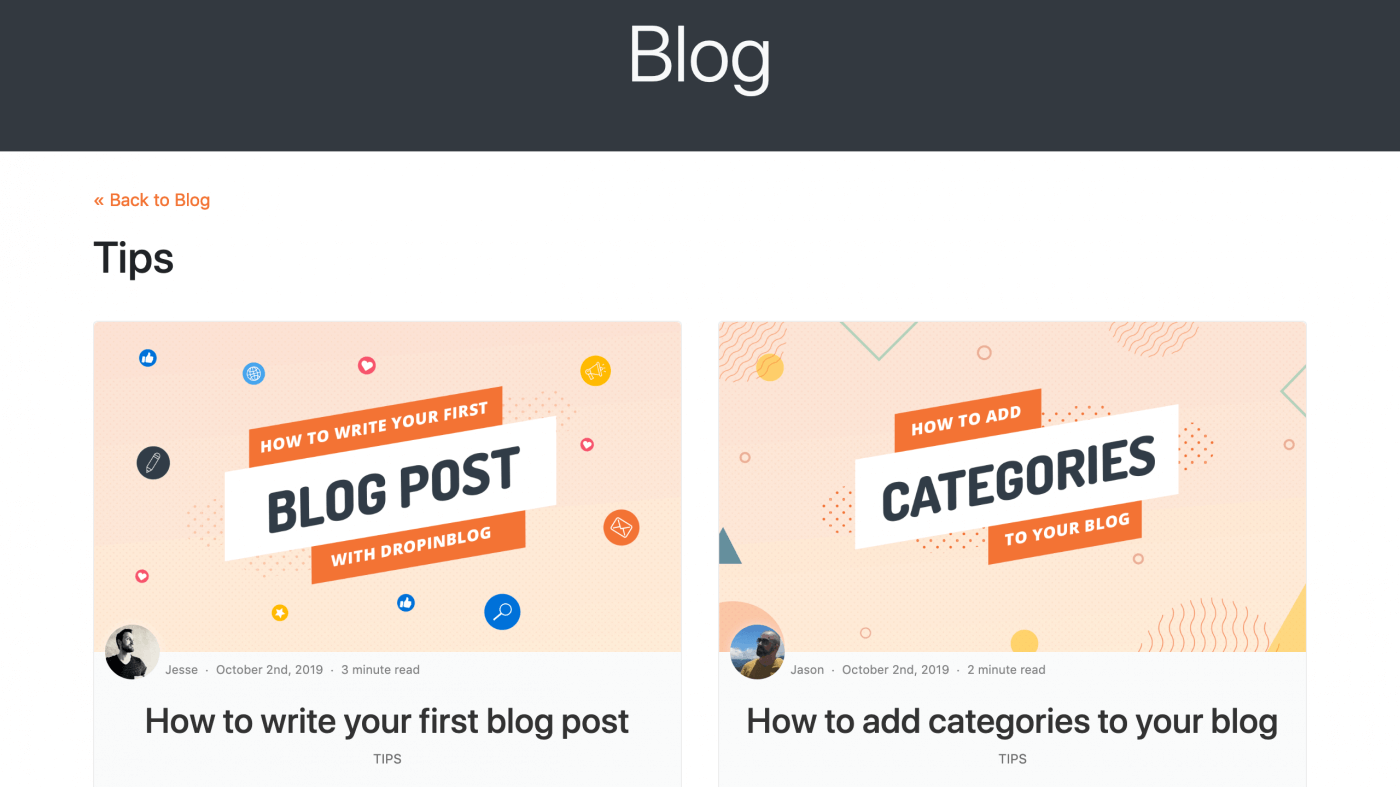
Et voila!
You have successfully categorized your blog posts for easy organization and site navigation. Your site visitors will thank you!
As always, please reach out with any questions or concerns on the support chat.
FAQs
Can I use Sellfy for free?
You can use Sellfy for free but only for the duration of their free trial. After that, you’ll have to subscribe to one of the platform’s paid plans.
Can I add a blog to my Sellfy store?
Yes, Sellfy lets you embed third-party solutions like DropInBlog into your online store. This is possible with Sellfy’s custom code module, but you can also use Zapier to integrate your store with other tools you already use.
